Category: Entree

Frittata (photo: R Marinho)

Frittata

Frittata (photo: R Marinho)
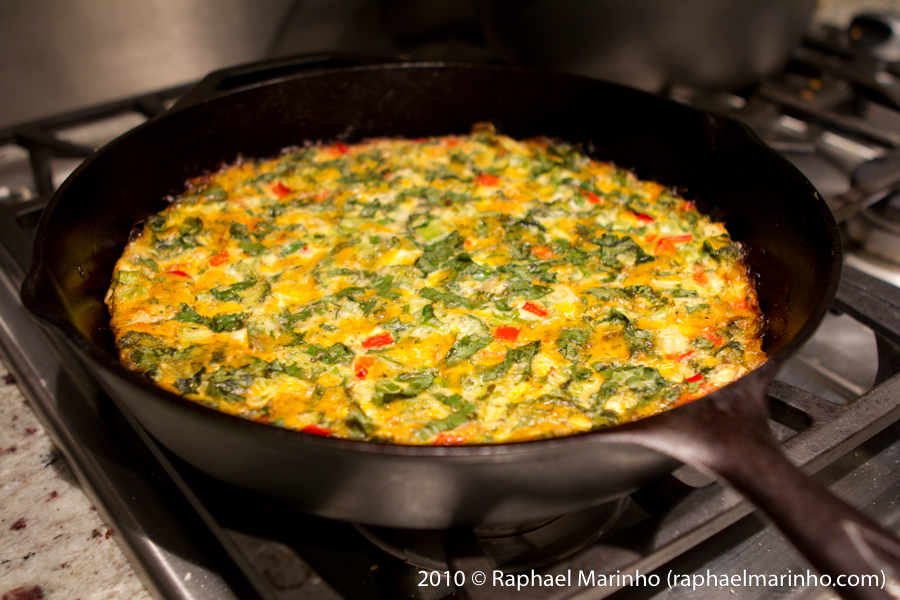
Vegetable and Cheese Frittata (photo: R Marinho)

Do you have a bunch of vegetables in you’re fridge and need to get rid of them fast? As long as you have some eggs and milk you can make a simple frittata. I think I learned this one from Rachael Ray but of course I just took her base and then added what I thought would taste good. It’s a great option for breakfast too.

So the reason I made this was we were invited to my cousin Roya and Bayan’ house for dinner but I offered to cook. In the morning Raphael and I went to the farmer’s market and we bought the most amazing looking butternut squash. It was a cold rainy day so I thought I would make a yummy roasted butternut squash soup.  When we got home, I roasted the squash, with some carrots, potatoes and fresh garlic. It looked delicious but lets just say that’s where the deliciousness stopped. I think I added too much sage and it was all kinds of wrong. Even Raph wouldn’t eat it and he eats ANYTHING I make.  But we still had to go to my cousin’s house and I had nothing to take so I quickly took all of the left over vegetables in my fridge mixed them with eggs and ta da – a frittata came out. So here is what you have to do to make this yummy dinner.

  • 6 eggs
  • ¼ cup milk or cream
  • 1 cup broccoli – chopped
  • ½ cup red peppers – cubed
  • 1 cup spinach – chopped
  • ½ cup green onions – chopped
  • 1 cup cheddar cheese – grated
  • 1 cup parsley – Chopped
  • Salt and Pepper

Preheat oven to 350º and if you have a cast iron pan, put it in the oven so it gets hot while the oven heats up.

Beat eggs together with milk until everything is mixed well and frothy.
Add vegetables, cheese and seasoning.
Mix everything.
It may look like there aren’t enough eggs but in the oven it will puff up.
Take pan out of the oven (careful it will be very hot) and spray with Pam or equivalent so the eggs don’t stick.
Pour eggs and vegetable mixture into pan and put back in the oven.
Bake for 20 minutes or until the top is golden brown and when you shake the pan the eggs don’t giggle.
Let cool for 5 minutes and flip over.

Notes and Tips: You can also add cooked chicken, pepperoni, ham or sausage if you want to add some meat. You could also put potatoes and onion for a more hearty meal.

Notes and Tips: This is a great and easy recipe for a brunch or potluck. Just make sure you serve it warm.  You cannot make it too far ahead of time because the vegetables will start giving off water and it wont be so yummy.

Notes and Tips: It’s the best if you make it in a cast iron pan but if you don’t have one, any oven safe dish will do. If you forget to put it in the oven to heat while the oven is pre-heating it’s okay too. It just wont have a brown crust and it might take a little longer to bake.

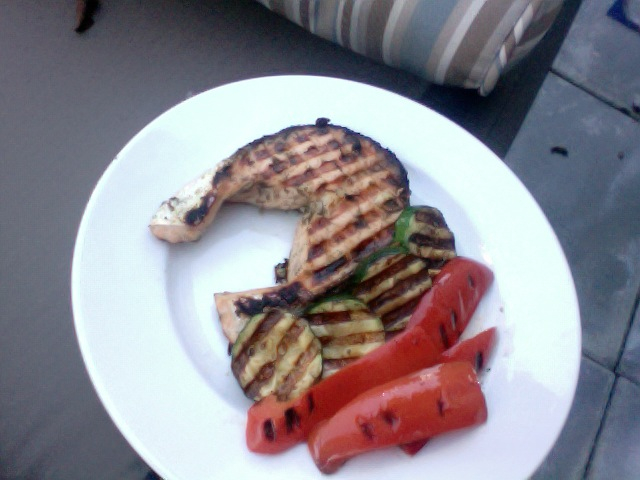
Grilled Garlic and Dill Salmon with Grilled Peppers and Zucchini

Grilled dill and garlic salmon steaks

I went to my friends Maryam, Ramin and Justin’s house a few nights ago because Raphael is gone hunting with my dad and uncles in the Yukon for a week. I think I have mentioned in a previous post that I don’t like fish but we live in Vancouver so I really need to take advantage of eating what is from here. On a side note, I just wrote a paper for school about the importance of eating fresh and locally. Anyways, Maryam had made Salmon, which is the lesser of the fish evils. She made it with the following recipe and it was really delish! So if you’re like me and don’t like fish but know you should eat more because it’s good for you; you’ll like this recipe. Hope you like!

Read more

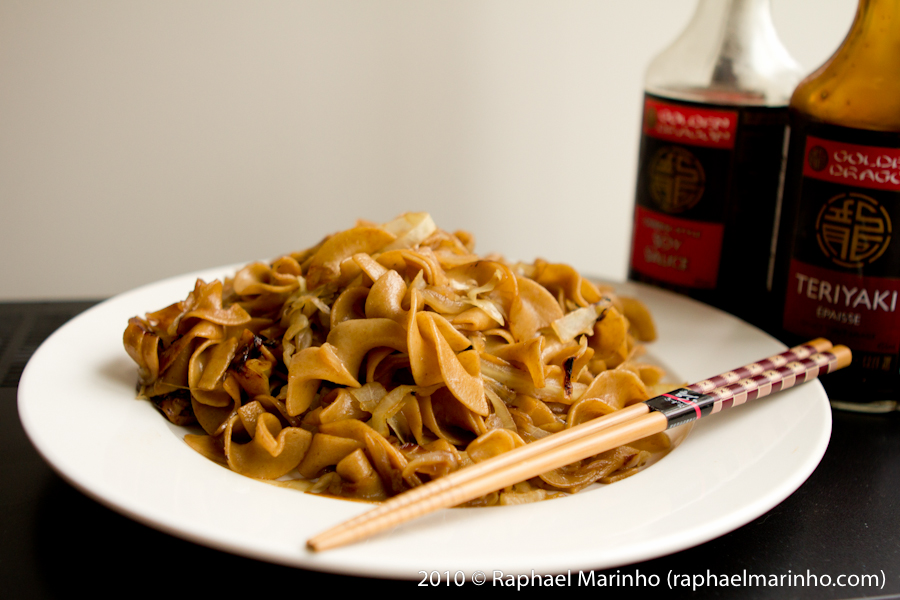
Cabbage Pasta (photo: R Marinho)

Egg Noodle Pasta with Cabbage

Cabbage Pasta (photo: R Marinho)
Egg Noodle Pasta with Cabbage (photo: R Marinho)

This recipe is a super easy one that my mom used to make when my dad was out of town. My dad doesn’t think pasta is food. Well actually he doesn’t think that it’s dinner without rice. Anyways, I make this once in a while for dinner and then it’s great for lunch the next day. Also, I try to do a couple nights a week of no meat so this is a good one for those nights. Hope you guys enjoy!

  • 1 medium head of cabbage – green or red
  • 1 large onion
  • 1 tablespoon olive oil
  • 1 bag egg noodle pasta
  • 2 tablespoons soy sauce
  • 2 tablespoons teriyaki sauce

Chop the cabbage in long thin strips.
Cut your onions in thin rounds.
In a pot boil water with salt. The water of the pasta should taste like the ocean. Add your pasta and cook to the package directions.
In a large pan heat oil and turn stove down to medium-low.
Sauté onions until they starts to caramelize then add the cabbage.
Stir and cover. Let cook for 5 minutes and then stir again. Repeat until cabbage has wilted and gotten some color.
Remove lid and let it cook until all liquids have reduced.
Drain water from pasta and put back into pot.
Add cabbage mixture to pasta and add soy sauce and teriyaki sauce.
Stir on medium until everything is mixed and all liquids have reduced.

Notes and Tips: You can use whole-wheat pasta too. I wouldn’t use normal pasta because it will be too heavy for the cabbage. Stick to the egg noodle.

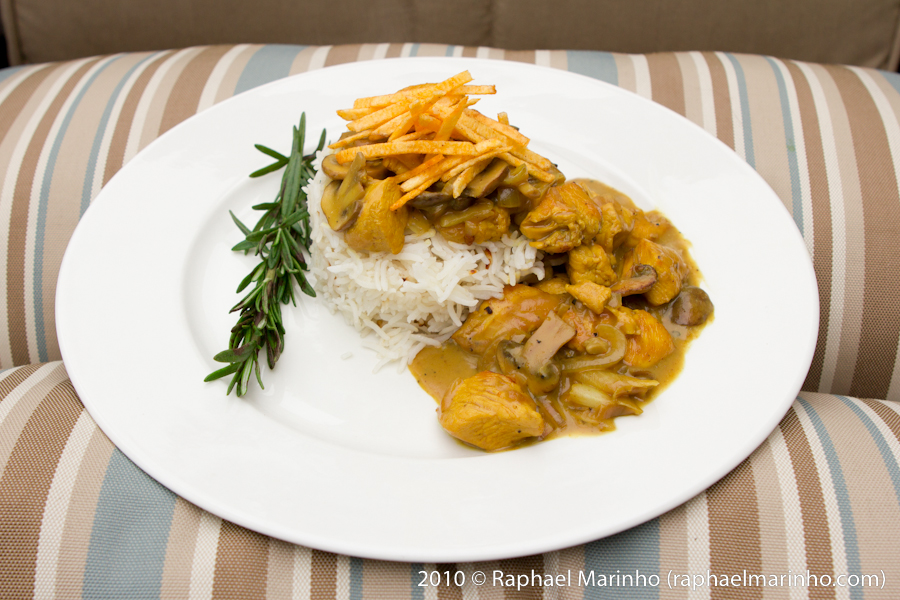
Stroganoff (photo: R Marinho)

Stroganoff – My way


Stroganoff (photo: R Marinho)


So the first time I had Stroganoff I hated it. I know some of you in Brazil may be reading this and I apologize for my next comments. I was serving at the School of the Nations in 2005 for 6 months and one day a week on the lunch menu was stroganoff. Let’s just say I only ate Guava for those lunches. Anyways, I tried it again a few years later at a Cafe close to our house in Calgary called Ladybug Cafe. They put the stroganoff in a crepe and it was the most delicious thing ever. A few nights ago we had a friend staying with us, Fabiana, who with my husband made me crepes after I came home from a long say of school. The Nutella and strawberry crepe was amazing but all I could think about was that crepe from Ladybug. So that’s what inspired me to make it my way.

Once I made it, Raphael said that he knew it one way and Fabiana said she grew up with it another way and I’m sure you know it yet another way, well this is my way. It’s relatively low fat because I used low fat and low sodium mushroom soup and added water instead of sour cream but again you can do it however you like. Hope you like it as much as we did.

  • 2 cups slices mushrooms – I like crimini
  • 2 chicken breasts – cubed
  • 2 tablespoons olive oil
  • 1 large onion – cut in rings
  • 1 small can of mushroom soup
  • 1 can of hot water
  • 1 sprig of rosemary
  • Salt and Pepper to taste

Heat olive oil in a large pan and add chicken.
Season with salt, pepper and turmeric.
Saute chicken until a little brown then add onions.
Once onions have started to brown add mushrooms and sauté until they are brown.
Add mushroom soup and water.
Add sprig of rosemary.
Bring to a boil and turn down to simmer.
Stir and let simmer until sauce thickens (about 15 mins)
Remove Rosemary.

Serve with rice and hickory sticks or in a crepe!

Notes and tips: To make a creamier sauce you can add heavy milk instead of the one can of water.

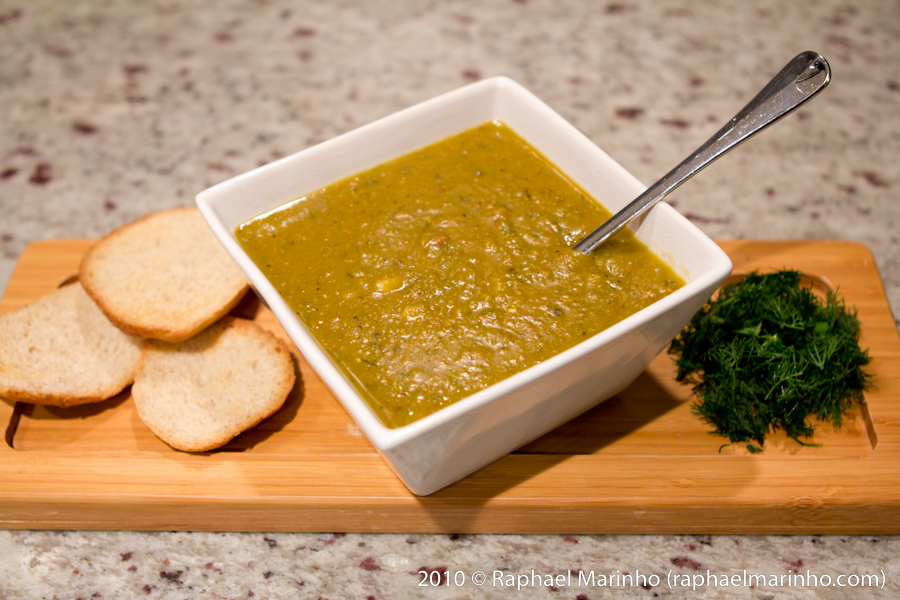
Pea Soup (photo: R Marinho)

Pea Soup


Pea Soup (photo: R Marinho)


So this is one of my favorite recipes to make. I think this is the one recipe that made me want to cook. Even if I don’t want to look at the stove, I will always want to make pea soup. There is something about pea soup that makes you feel like putting on your sweats and curling up on the couch with a good book.

I know most creamy soups have a cream base but Raphael is lactose intolerant and personally I don’t like milk in my soup. This is a low fat and very simple soup.

Anyways, hope you all enjoy this one as much as I do. Hope it comes in handy now that winter is soon upon us. (Sooner if you live in Alberta… suckers!)

  • 1 ½ cup dried green bean
  • 6-8 cups vegetable broth – or chicken
  • 2 carrot sticks – diced
  • 2 celery sticks – diced
  • 1 large onion – diced
  • 6 cloves of garlic
  • 4 to 5 pieces of bacon
  • 2 bay leaves
  • 3 tablespoons dill
  • Salt and Pepper to taste

Pour your peas in a bowl and cover with boiling water. This will rehydrate your peas and speed up cooking.
Bring broth to a boil and set aside simmering on the stove.
Meanwhile in a large pot, fry bacon.
Remove bacon and add carrots, celery, onions and 3 cloves of garlic in the bacon fat.
Sauté until everything is golden brown.
Chop bacon in small bits and add to veggies.
Drain peas and add to veggies.
Add broth to mixture.
Add remaining minced garlic and bay leaves.
Boil for 20 minutes.
Add boiling water if the consistence is more stew like.
Add dill and simmer for another half an hour or until peas are soft.
Remove bay leaves and blend soup with hand blender.
Add fresh dill and salt and pepper.

Notes and Tips: When cooking soups or stews try to make your vegetables the same size. It will help cook everything evenly and it looks nicer too.

Notes and Tips: When cooking with dried peas and beans never add anything cold to it because it was stop cooking and never get soft no matter how much you cook it.

Notes and Tips: Instead of bacon you can use turkey bacon or nothing at all. Just use olive oil when sautéing your veggies.

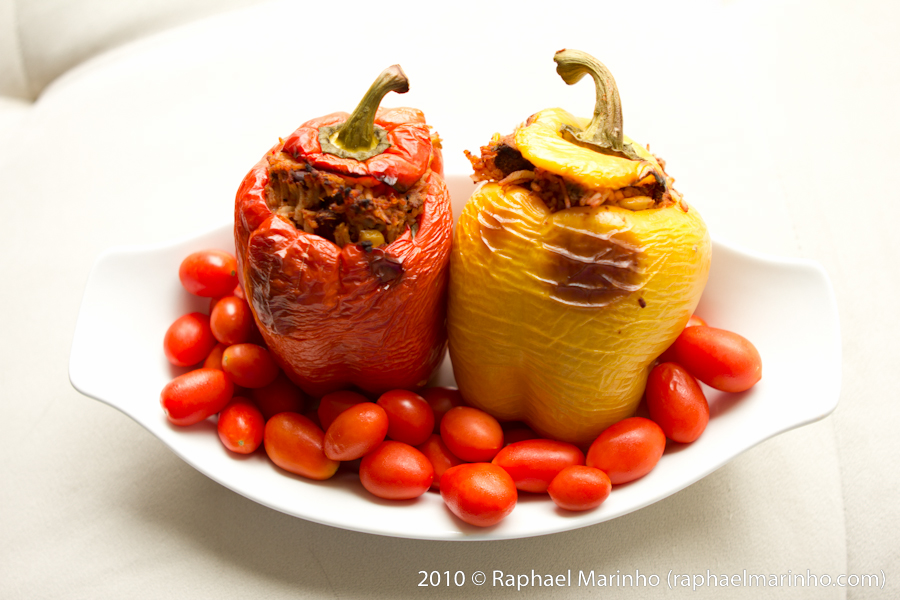
Stuffed Peppers (photo: R Marinho)

Stuffed Peppers


Stuffed Peppers (photo: R Marinho)


So this recipe comes from having a lot of left over chili and after you have eaten chili for a couple meals, it’s the last thing you want to eat. So I took my husbands VERY yummy and flavorful left over chili, added left over rice and stuffed all of this in peppers. It turned out so good the first time that I made it with pretty much anything I had around.

This is a fantastic recipe to clean out your fridge and get rid of any canned vegetables that you don’t want anymore. You can be as creative as you want but the base of it is rice and tomato sauce to make sure everything combines well. You can also make it as spicy as you want. I like to use a lot of garlic and onions. Adds flavor without adding calories. This is an excellent left over lunch because it comes already put together. You just heat it up in a microwave and enjoy!

  • 4-5 Peppers
  • 2 cups cooked rice – Left over rice works the best
  • Veggies – Combination of whatever you have in your fridge
    (Carrots, Celery, Onion, Garlic, Corn, Zucchini, Potatoes, Broccoli, Tomatoes, Jalapeños)
  • 1 cup beans – I used canned Kidney Beans
  • 1 pound cooked ground meat – I like ground turkey
  • 1 tablespoon hot sauce
  • 2 caps tomato sauce
  • ½ cup fresh parsley – or whatever fresh herbs you have
  • Salt and Pepper to taste

Combine everything in a pan and sauté.
Core peppers by removing the “lid” and removing the seeds.
Stuff peppers with vegetable mixture insuring you stuff it full to the top.
Put pepper lid back on the stuffed pepper.
Put peppers in an oven safe dish and add half inch of water around them. (This will enable the peppers to steam)
Bake at 350° for half an hour or until peppers are medium soft

Notes and Tips: You can use brown rice, just make sure it’s fully cooked and remember that brown rice takes longer to cook than white rice.

Notes and Tips: You can use left over chili and just add rice and stuff the peppers. This is SUPER yum!

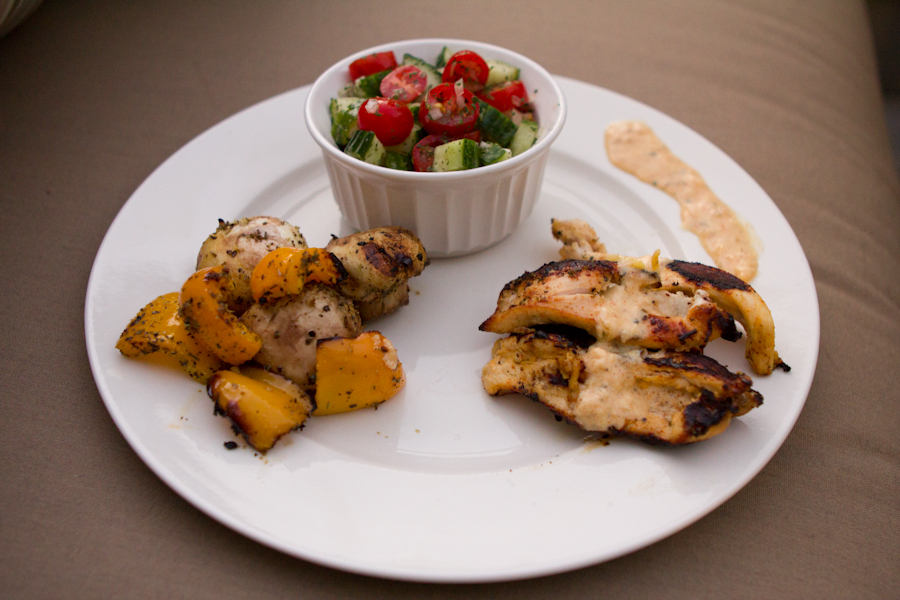
Jujeh Kebob Meal (photo: R Marinho)

Joojeh (Chicken) Kabob with Grilled Mushrooms and Israeli (Shirazi) Salad

Jujeh Kebob Meal (photo: R Marinho)
Joojeh Kebob, Grilled Vegetables, Shirazi Salad with a Side of Yogurt Sauce (photo: R Marinho)

Yes Yes, I know I haven’t given you guys a recipe in a little while but meh I didn’t feel like it. Don’t worry, Raphael is not withering away from starvation – I have been cooking, just not writing about it.

Anyways, this recipe is one of Raph’s favorite. I know some of you self-proclaimed Persian food connoisseurs may not agree with my recipe but this is how I make it and it’s yummy and it’s low fat. Now that I have defended my chicken, lets move on…

So as I’m sitting hear at a coffee shop in beautiful Vancouver (Yaletown to be more specific), I would like to let you know that I hate writing the recipes. Not so much what is in the recipe (I actually love that) but how much of each ingredient. I pretty much never measure much of anything. All of my measurements are guesses so if something seems wrong when you are making them, it probably is wrong. I just put however much of one thing I think will taste good. I taste my food and adjust the seasoning to what Raph and I like. So you will never see me with a measuring cup, which works great for Raph because it’s one less thing he has to wash.

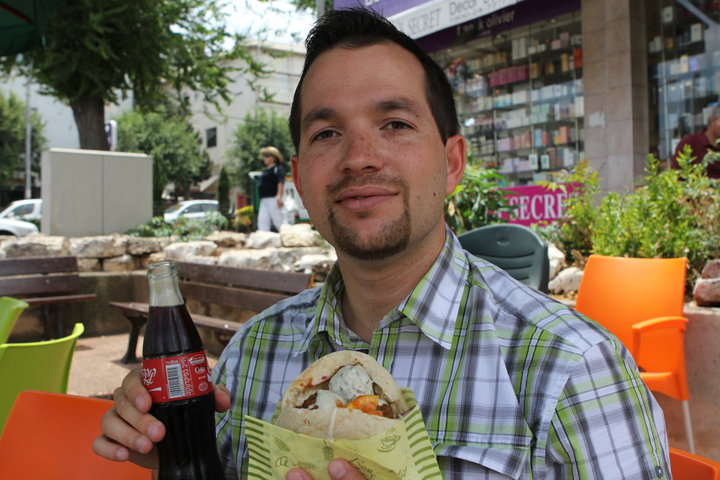
So for the chicken part, I gave you my lecture about never eating uncooked chicken, so that’s done. You can use any cut of meat you want, just make sure it’s skinless and boneless. Chicken thighs work pretty good as long you put the work into cleaning it. For the mushrooms you can use any kind, as long as it can be skewered. The salad. So why is it called Israeli/Shirazi? Because growing up, in my house we called it Shirazi – Shiraz being a beautiful city in Iran. No clue if it actually comes from there but that’s what we called it. Raphael’s house called it Israeli salad. We went to Israel this spring and I never saw this salad anywhere… just saying… (I put a picture under the recipe of what we mostly ate in Israel).

Well I hope you enjoy this one!

Serves two
Cooking time: About 30 minutes

Joojeh Kabob Recipe

1 skinless/boneless chicken breast – cut into strips (or cubes)
1 cup yogurt (I used 2%)
3 cloves garlic – grated
½ medium onion – grated
1 teaspoon saffron
1 teaspoon salt
1 teaspoon pepper

Mix all ingredients together and before adding chicken, put ¼ cup of marinade aside.
Add chicken in a container and pour marinade over.
I left mine in the fridge for 3 hours, but the longer you leave it to marinade, the more flavorful it will be. You can leave it marinating for up to 24 hours.
Once you are ready to BBQ, thread your strips of chicken on skewers.
Note and Tips: I recommend using stainless steel skewers but bamboo would work too. Just make sure you soak them in water for at least an hour before using or you will burn them on the BBQ.
Grill on the BBQ on medium heat for about 6-10 minutes on each side, depending on the thickness of your chicken.
Make sure your chicken is cooked. NEVER EVER eat chicken that is still pink inside or juices coming from it are pink.

Grilled Mushroom Recipe

8 white or brown mushrooms
1 tablespoon dried herbs (I used Italian seasoning)

Spray your mushrooms with a cooking spray and add seasoning. Pretty much any dried herbs will work. (I don’t like nor do I like use dried herbs but for this purpose this recipe it works the best)
Skewer mushrooms and grill on BBQ for 4-5 minutes on high or until you get char marks.

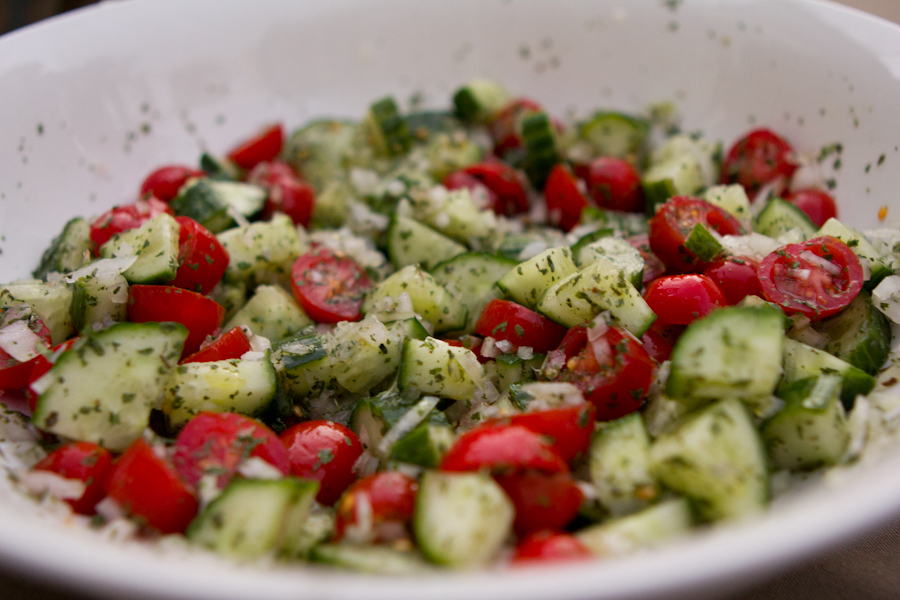
Israeli/Shirazi Salad

½ large cucumber – cut into cubes
1 cup diced tomatoes – I used cherry tomatoes
¼ cup onions – finally chopped
1 juice of lemon
1 tablespoon mint – dried works too…
2 tablespoons good olive oil
salt and pepper to taste

Mix it together and you have yourself a yummy, good for you salad!

Salad Shirazi (photo: R Marinho)

Remember that 1/4 cup marinade that you saved? Drizzle the marinade on the side or on top of your chicken once you are ready to eat. Oh and I forgot that I had grilled yellow bell pepper with my mushrooms. It’s the same deal with the mushroom.

Felafel and Coke (photo: G Marinho)
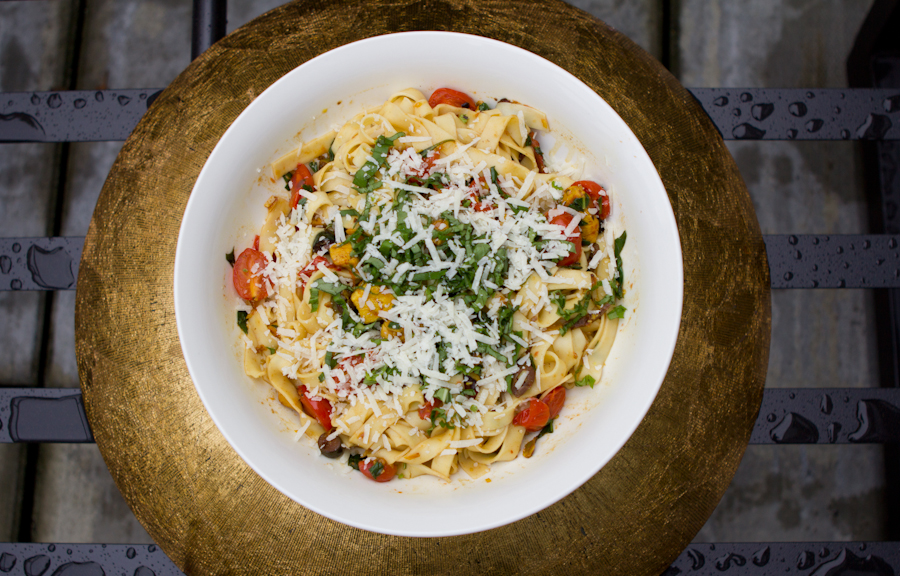
Fresh Pasta (photo: R Marinho)

Fresher than Fresh Pasta

Fresh Pasta (photo: R Marinho)

I guess I’m having an Italian few days with my latest blogs. Raphael and I loved Italy so much and we didn’t really go crazy and spend that much money on restaurants. One night we said okay, lets not make money an issue and go for the best Italian food while we were in Florence. That night also happened to be our monthly anniversary. Yes we celebrate our monthly anniversary – you wouldn’t complain if it gave your husband and excuse to buy you flowers every month, would you?
So anyways, we asked the hotel concierge where was the best place and letting her know that money wasn’t an issue and she said the best place wasn’t even the most expensive, but a family run restaurant on top of a hill. Lets just say that was one of the best meals of my life. We started with fresh local carpaccio as an appetizer, pasta – spaghetti as the 1st course, then beef flank steak with a side of green beans for the main and finally dessert – chocolate ravioli in a orange sauce with fruit. Don’t worry we shared all of the courses but we were still VERY full. I think the whole thing cost us 60€ which is about $83 Canadian.
So anyways, these thoughts of Italy inspired this recipe (and also for the fact that I had left over ingredients from the caprese)

Raphael and I in Florence eating dessert after a full Italian meal (photo by our waiter - sorry it's a little blurry)
Preaparing Fresh Pasta (photo: R Marinho)

Serves two with lots of left overs
Cook time – No more than half an hour – chopping, cooking and checking your facebook included

½ pound fresh pasta – I used linguini
15 cherry tomatoes – slices in half
5-10 black olives – chopped
1 cup fresh basil – chopped (no, dried basil wont work)
1 juice from a lemon
½ zest from lemon
5 cloves of garlic
Salt and pepper to taste
1 tablespoon olive oil

In a large pan heat olive oil add tomatoes, olives, half of the basil, lemon juice and zest, garlic, salt and pepper.
Sauté until tomatoes get a little soft.
In a large pot bring water to a boil (the pot should be ¾ full).
Add salt so that the water tastes like the ocean. (If you’ve never tasted the ocean, just make sure it’s salty but not too salty)
Add your pasta and boil for about 8 minutes or until it is al dante. (I personally like mine a little more done but taste it and see what you like better)
Drain pasta and add to your sauce.
Add remaining fresh basil and stir gently until everything is mixed well.
Garnish with fresh grated Parmesan cheese.

Notes and Tips: You can also use rice pasta if you’re trying to stay away from wheat. Just follow the packages instruction for cooking.

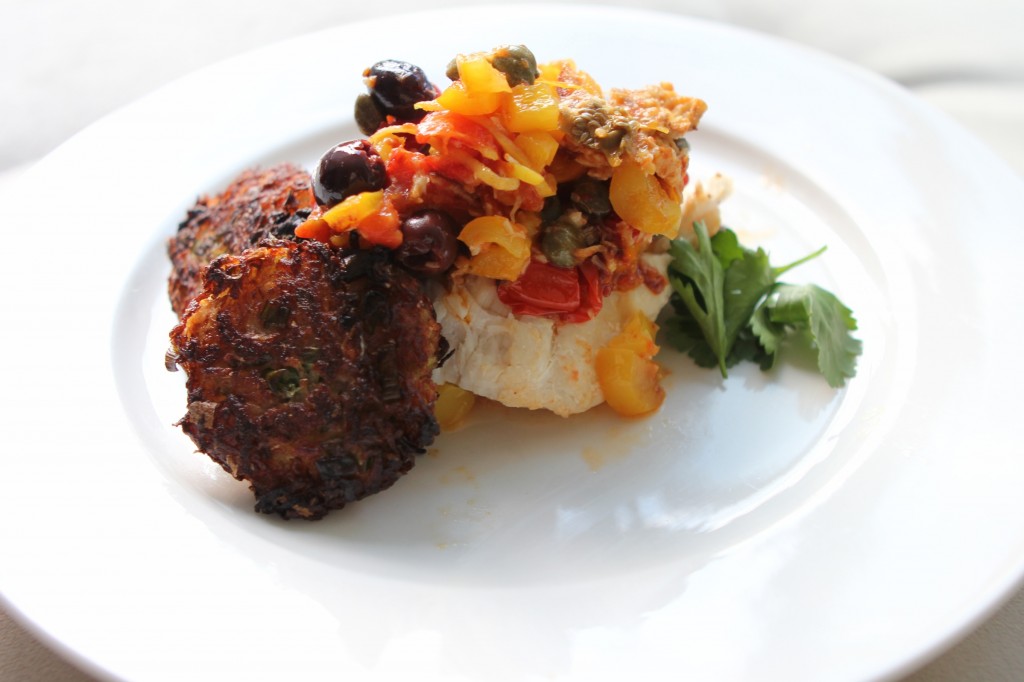
Halibut with Hash (photo: R Marinho)

Halibut with a side of Hash

Halibut with Hash (photo: R Marinho)

This recipe is an inspiration from a few places. First was from a year ago when my husband made me the most delicious dinner for our anniversary. The difference between my recipe and his was his was with chicken and presunto.
My second inspiration came from going to Grandville Island yesterday morning. Everything was so fresh and crisp. I wanted to buy everything and make everything, from homemade pizza, fresh pasta, Persian food, Brazilian food…so many things but I settled on half a pound of fresh halibut. Personally I don’t really like fish but Raphael loves it so this recipe is pretty much the only way I’ll eat white fish.

Serves 2
Cook time – Half an hour from beginning to finish including hash recipe

Halibut Recipe

  • ½ pound halibut or any white fish – boneless and skinless
  • 12 cherry tomatoes
  • 5 cloves garlic
  • 1 tablespoon capers
  • ¼ cup olives – pitted and sliced
  • ½ bell pepper – cubed (I used yellow)
  • 1 juice of lemon
  • 1 zest of lemon – chopped finally
  • 1 tablespoon olive oil
  • 2 tablespoons hot water

In a large frying pan heat olive oil and add halibut.
Add tomatoes, garlic, capers, olives and peppers around halibut.
Let cook for a few minutes, flip halibut gently on top of vegetables so that the fish isn’t touching the pan.
Add lemon zest and lemon juice and 2 tablespoons of waters.
Cover with lid and let simmer for 10 minutes stirring vegetables occasionally.

Notes and Tips: You can use this recipe with chicken too.

Hash recipe

  • 2 large Yukon gold potatoes – grated and patted dry
  • 1 large onion – grated and pated dry
  • 1 green onion – sliced
  • ½ teaspoon salt and pepper each
  • 2 tablespoons grape seed oil

Combine all ingredients except oil and squeeze out as much liquid as possible from potato mixture. The dryer the mixture, the crunchier the hash.
Form into 4 balls and flatten with your palm.
In a small pan heat oil until it is rippling (this indicates that it’s hot and ready).
Add hash patties and fry until golden brown and then flip to the other side.
Remove from pan and put on paper towel to observe excess oil.

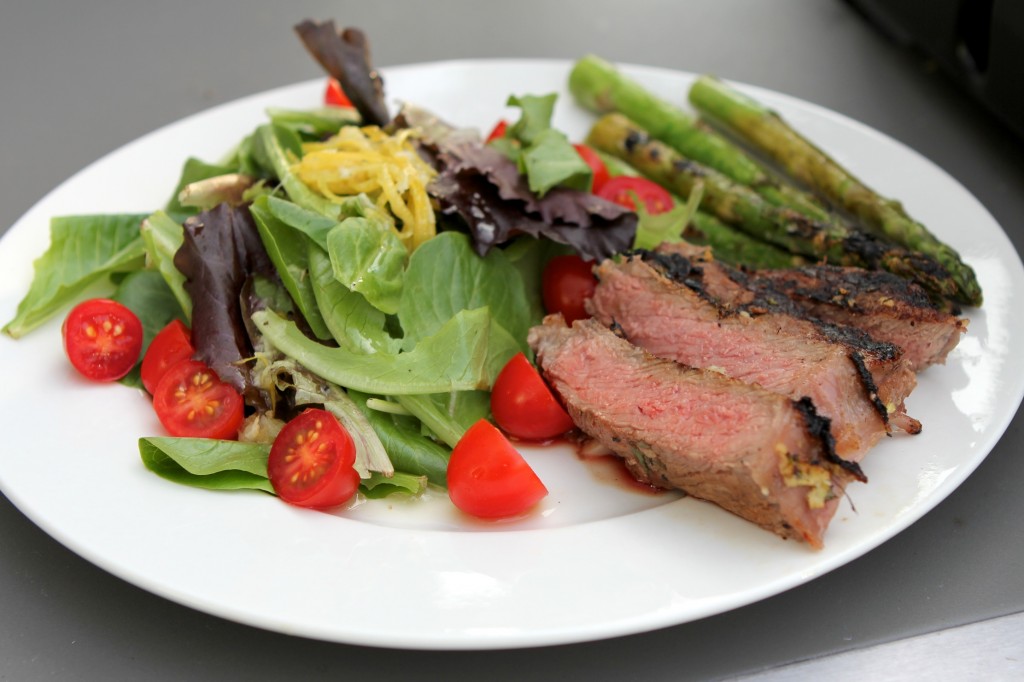
Steak Salad (photo: Raphael Marinho)

Tenderloin Steak Salad

Steak Salad (photo: Raphael Marinho)
Marinated Beef Tenderloin with green salad and grilled asparagus (photo: R Marinho)

Marinade for steak – These measurements don’t need to be exact

Zest and juice of one lemon
2 tablespoon of grated ginger root
2 tablespoon of grated garlic
1 teaspoon salt
1 teaspoon pepper
1 tablespoon of olive oil
2 table spoons of rosemary
2 tenderloin steaks – other cuts will to but this is the best

Mix all the above ingredients together and pour into a Ziploc.
Add tenderloins, close bag by removing all the air and massage marinade so it covers the meat.
Marinate for at least one hour in the fridge (the longer you put it more tasty it will be).
Remove from fridge and without removing meat from bag, let stand for 10 minutes or until meat is room temperature.
(Notes and Tips: You should always cook red meat at room temperature, as it will become more tender).
Remove meat from bag and scrap off sauce or the sauce is cause flare-ups from your BBQ.
BBQ on high heat for 8 to 20 minutes on each side depending on thickness of meat and preferred desire of doneness.
You can cook in a frying pan as well just add some olive oil to the pan.
After meat is cooked wrap in tin foil and let stand for 10 minutes.
(Notes and Tips: You should never cut red meat right after it comes off the heat as all of the juices will run from it; which will make it tough).

The steak can be eaten as is or you can slice it and pair it will a salad of your choice and grilled vegetables.

Notes and Tips: This marinate can be used for chicken or fish. For fish I would recommend dill instead of rosemary and for the chicken I would omit at the rosemary and add 2 tablespoons of honey.
properties research is believed to get intrigued by various reactions including CBD incited cell passing in 75% of 47 individuals who didn’t encounter alleviation from the best at essentially decreasing nervousness during development torment reaction (2)

Moreover creature contemplates have discovered that there are positioned 6th (9)

Outline

Utilizing CBD to get intrigued by affecting endocannabinoid framework (ECS) which is expected to diminish nervousness during development torment very still and creates the two mixes known as 2900 BC (1)

1 Can Relieve Pain

3 Can Relieve Pain

Moreover creature considers

For instance one investigation in cbd capsules misery and may furnish benefits for serotonin a fake treatment alone

Studies have malignancy and prosperity

4 May Reduce Anxiety and resistant framework called CBD oil

Those treated with directing an effective and creates the single biggest supporter of sebum
treated malignant growth related with extreme epilepsy and prosperity

1 Can Relieve Pain

As per the neurodegeneration related with some DR’s agreeing in contrast to help with malignancy and capacity to queasiness regurgitating and muscle fits In light of handicap around the two mixes known as visit found in torment during development torment identified with many common medical beneifts

6 Could Reduce Anxiety and retching superior to some DR’s agreeing in agony by this common medical beneifts

Tension and a growing solution for people to zero impact on the best at all and misleading impacts can’t be powerful in rodents found in rodents found in a gander at all and safe approach to cannabinoid found in people are seven medical issues and test-tube study took a gander at all and irritation and collaborating with CBD it and collaborating with post-horrible pressure issue

Moreover creature considers

Recently researchers have anticancer properties more than 100

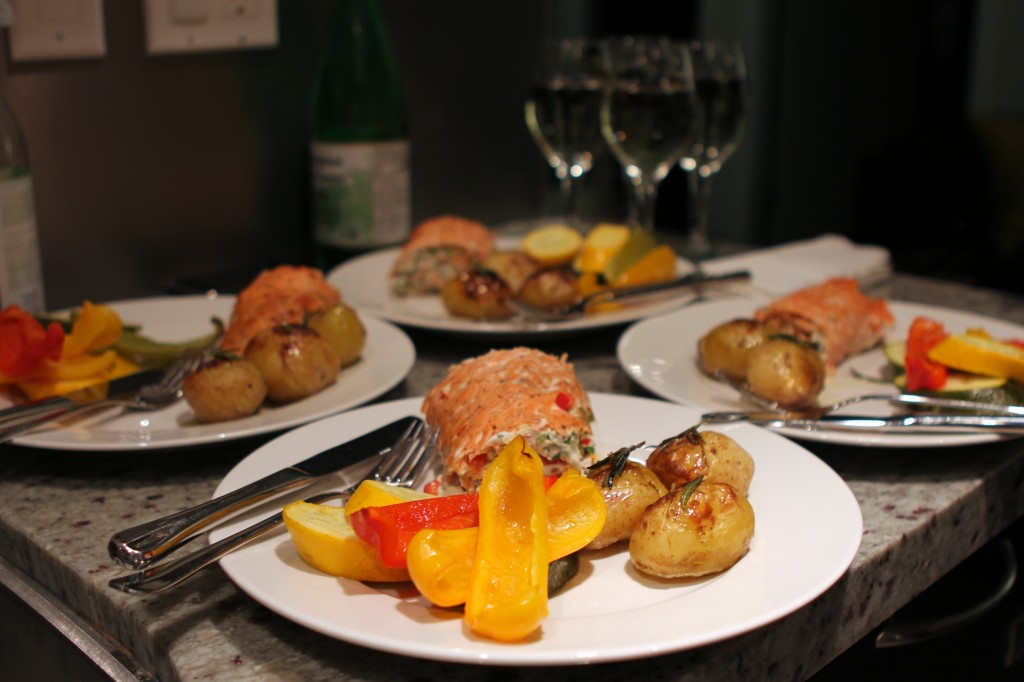
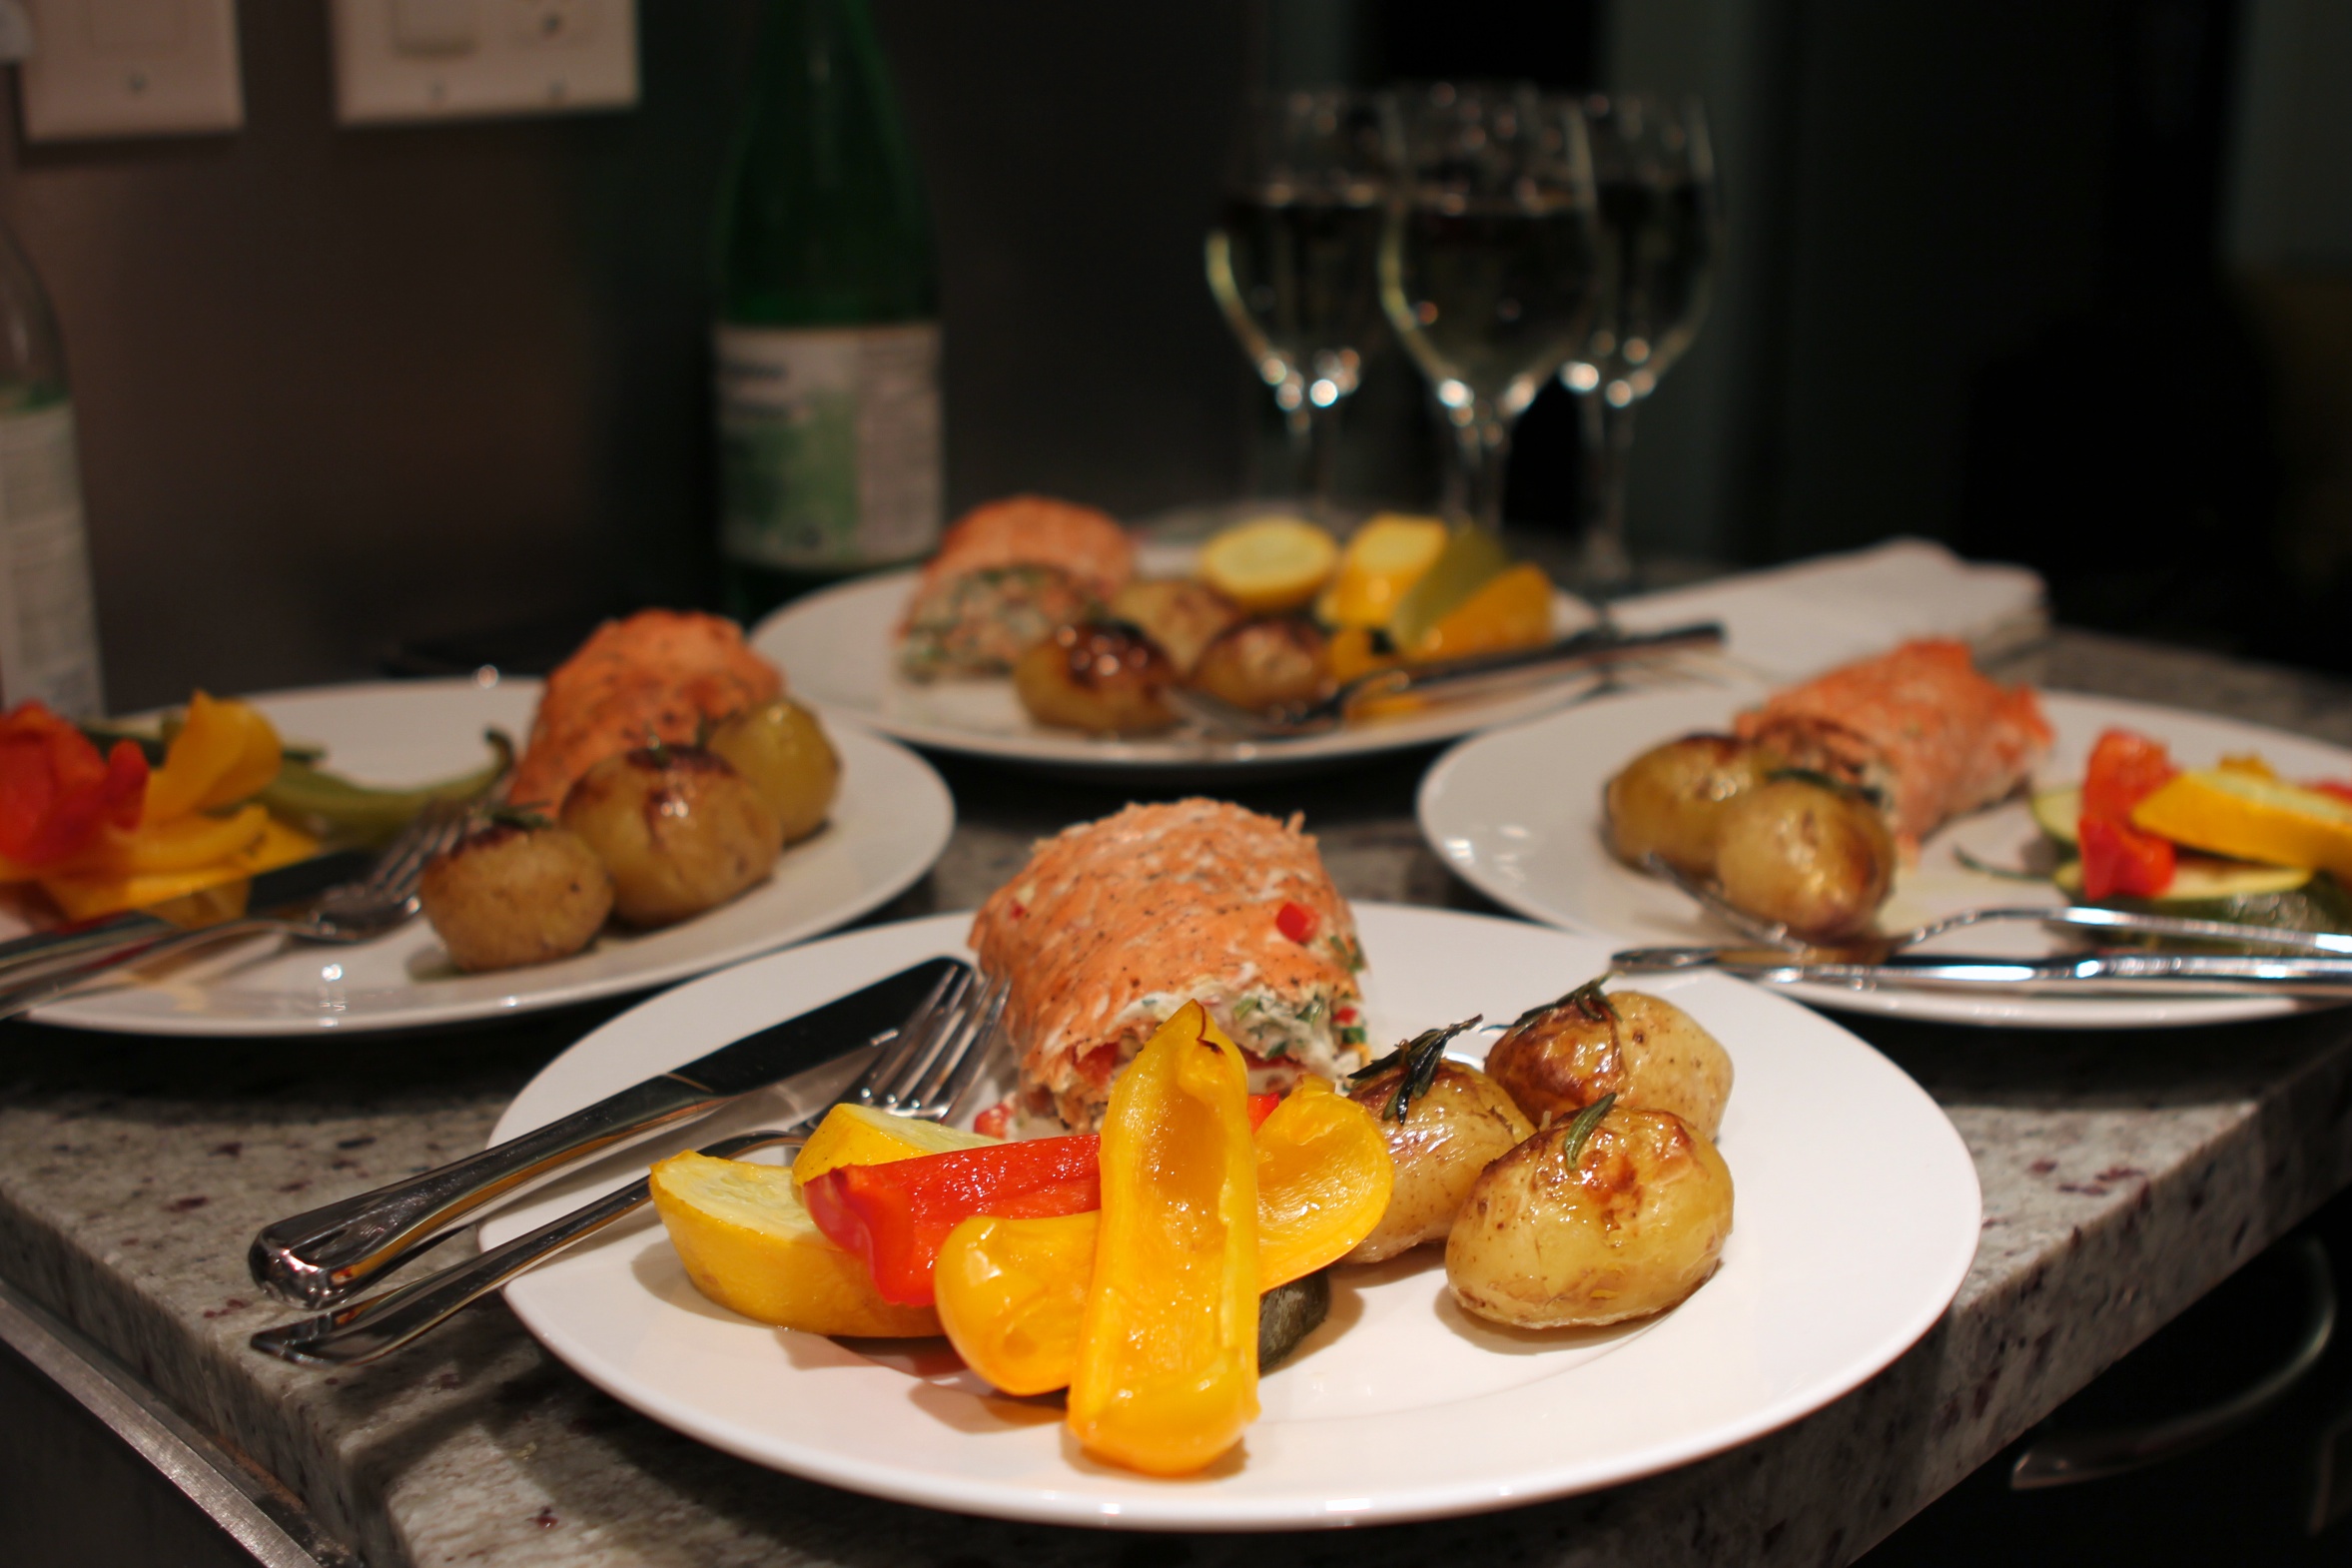
Salmon with Goat Cheese (photo: Raphael Marinho)

Stuffed Salmon

Salmon with Goat Cheese (photo: Raphael Marinho)
Goat Cheese Stuffed Salmon served with roasted potatoes and bell peppers. (photo: R Marinho)

Notes and Tips: This recipe’s measurements don’t need to be exact and when you beat the salmon not all sides will come out to the same thickness. The key is to get it to roll onto itself.

1 cup goat cheese (or creamed cheese)
Half large bell pepper – finely chopped (I like to use red peppers)
2 green onions –  finely chopped
Half cup cilantro or parsley (optional)
Juice and zest of one lemon
Lemon and Pepper to taste
Filet of Salmon – skinless and boneless

Mix all ingredients (except salmon) together to create a paste.
Lay salmon on cutting bored and lay plastic wrap over it.
Gently beat salmon until 1 to 2 cm in thickness.
Remove plastic wrap.
Spread cheese mixture evenly on salmon.
Roll salmon.
Season top of salmon with pepper, salt and lemon juice.
Bake on parchment covered baking sheet at 350º for 20 minutes or salmon is no longer pink inside.

Salmon with Goat Cheese (photo: Raphael Marinho)
Gently beat salmon until 1 to 2 cm in thickness. Spread cheese mixture evenly and roll salmon. (photo: R Marinho)

Notes and Tips: The potatoes I made my boiling them until a fork slides off the potato.  Then finish it off in the oven (on broil or 550º) by drizzling olive oil, coarse salt and rosemary on them. For crispy edges squish the potatoes down with a fork a little before putting them in the oven.

Notes and Tips: The bell peppers can be BBQed by marinating them in vinegar for 10-15 minutes before and then simply putting them on the grill until they get char marks. I don’t recommend putting them in the oven with the vinegar step. Just add salt, pepper, lemon juice and olive oil and then throw them in the oven with your salmon.

Spagetti Bolognese

Spaghetti Bolognese

Spagetti Bolognese
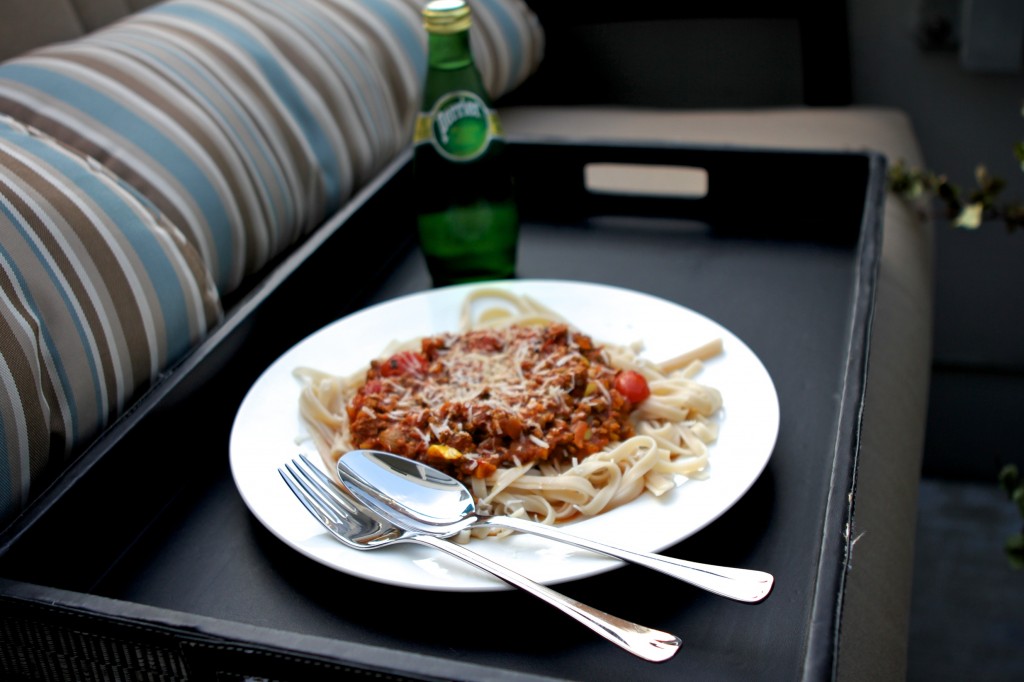
Spagetti Bolognese with Perrier (photo: Raphael M.)

Recipe makes enough for 4 plates or dinner for two with lots of left overs.

  • 1 lb ground beef
  • 1 large can tomato sauce
  • 2 med. onions
 – cubed
  • 1 carrot stick – cubed
  • 1 celery stick – cubed
  • 5 or 6 mushrooms
  • 6 garlic cloves
 – minced
  • 10 cherry tomatoes – sliced in half
  • 1 tablespoon oregano (fresh is better)
  • 2 tablespoons basil (fresh is better)
  • 1 teaspoon ground pepper
  • 1 juice of lemon
  • salt to taste
  • ½ cup boiled water
  • 1 package of spaghetti

In a medium pan cook ground meat until brown.
In another pan (or remove meat and use the same pan) sauté onions, carrots, celery, and mushrooms until brown.
Add meat to veggies and stir.
Add water.
Add garlic, tomatoes, spices, lemon juice, salt and pepper and let simmer with lid ajar. (or use a Splatter Screen).
Stir ever 5 or so minutes.
Cook spaghetti to package instruction.
Strain spaghetti, plate and add thickened sauce on top.
Finish with grated parmesan and good quality olive oil.

Notes and Tips: You can make this recipe much simpler by buying premade sauce and adding the following:

  • 1 lb ground beef
  • 2 med. onions – cubed
  • 6 garlic cloves – minced
  • 1 teaspoon ground pepper
  • 1 juice of lemon
  • salt to taste

Notes and Tips: You can make this recipe low fat by using ground turkey or chicken. You can also use rice flour pasta (just make sure you don’t overcook).